Installing screws and other threaded fasteners with WEST SYSTEM epoxy dramatically improves load carrying capacity by spreading the fastener’s load into a greater area of the substrate. There are several methods or levels of hardware bonding depending on the loads on the hardware.
Basic Fastener Epoxy Bonding
Wet out a standard pilot hole and install the fastener.
For improved pullout strength and waterproof connections, the easiest method is to simply wet out stripped fastener holes and new pilot holes before installing the screws. Epoxy penetrates the fiber around the hole, effectively increasing the fastener diameter. Epoxy also provides a stronger interface with the fastener threads than wood fiber and keeps out water.
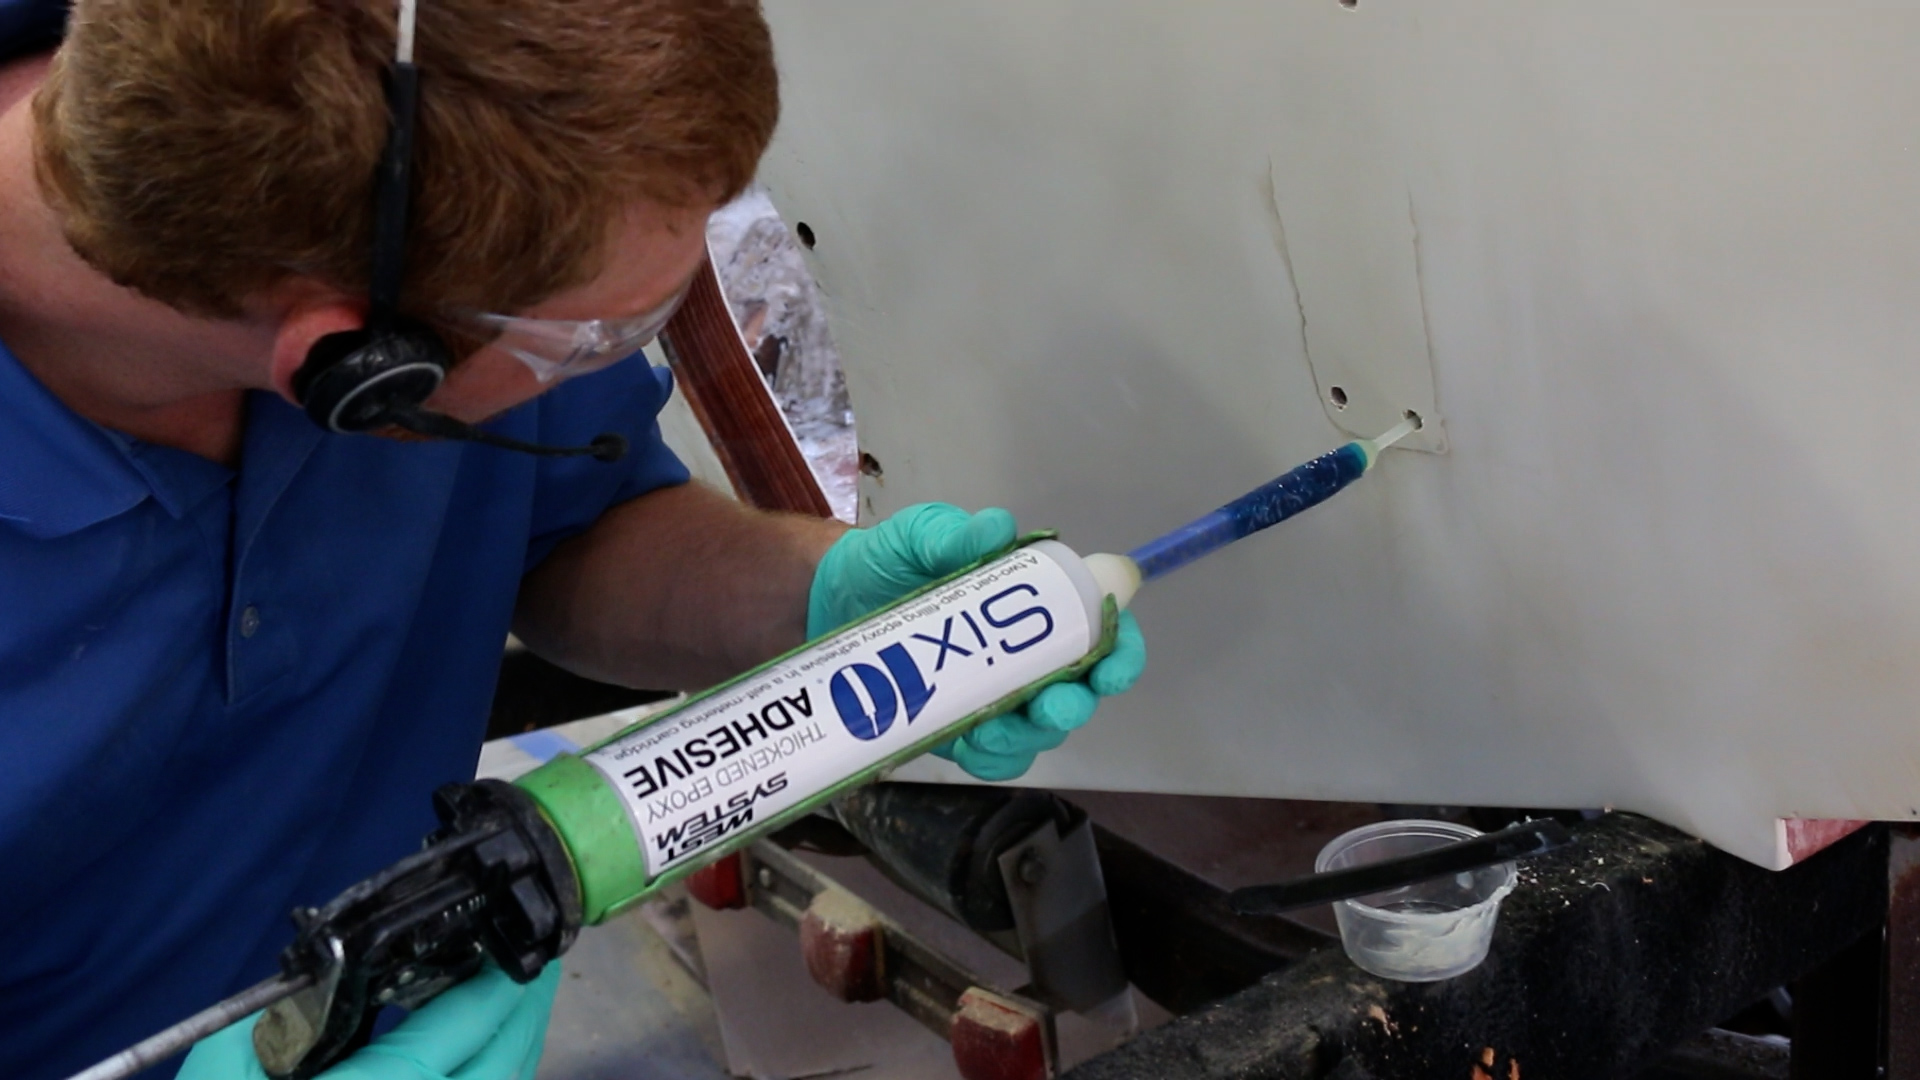
- Wet out a standard-size pilot hole. Work the epoxy mixture well into the hole with a pipe cleaner or syringe. Thicken a second coat of epoxy as necessary for stripped or oversized holes.
- Insert the fastener in the hole and allow the epoxy to cure.
Advanced Fastener Epoxy Bonding
For greater strength and stability, drill oversized holes to increase the exposed substrate area and the amount of epoxy around the fastener.
- Drill oversized holes 2/3 – 3/4 the depth of the fastener. The diameter may be up to twice the fastener diameter (Figure 16a).
- Drill a normal-sized pilot hole at the bottom of the oversized hole to the full length of the fastener. The normal-sized pilot hole serves to hold or clamp the hardware in position until the epoxy cures. If the fastener hardware can be clamped by other means, the oversized hold can be extended to the end of the fastener.
- Wet out the holes and the fastener with epoxy. Allow the epoxy to thoroughly soak into the exposed substrate
- Fill the hole with thickened epoxy/adhesive filler. Use 404 High-density (preferred) or 406 Colloidal Silica.
- Install the fasteners with just enough force to hold the hardware in place. Allow the epoxy to cure thoroughly before applying loads to the hardware.
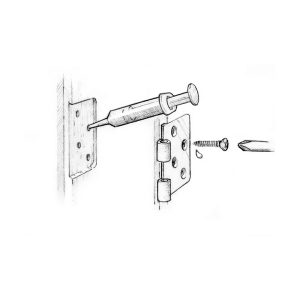
Bonding Hardware with Epoxy
Bonding hardware with epoxy goes a step beyond bonding the fasteners only. By bonding the hardware base directly to the surface you further increase hardware load capacity and provide a solid bearing surface for the hardware. It also seals the wood underneath and is a stronger, longer-lasting attachment than bonding the fasteners only. It is especially useful to mount hardware on curved, uneven or un-level surfaces.
- Prepare the mounting surface and the hardware base for good epoxy adhesion.
- Wet out the oversized hole with epoxy. Allow the epoxy to soak into the exposed end grain of the wood (as with fastener bonding).
- Coat the bottom contact surface of the hardware with unthickened epoxy. Wire brush or sand the wet epoxy into the surface with 50-grit sandpaper.
- Inject a non-sagging epoxy/404 or 406 mixture into the hole. Use enough epoxy mixture so there are no voids in the hole after inserting the fastener. Coat the bottom of the hardware and the fastener threads with thickened epoxy.
- Place the hardware in position. Insert and tighten fasteners until a small amount of the epoxy mixture squeezes out of the joint.
- Remove excess epoxy or shape it into a fillet. Allow the epoxy to cure at least 24 hours before applying load to the hardware. Allow more cure time in cooler weather.
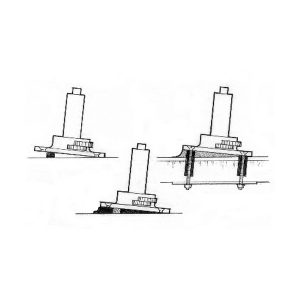
Casting an Epoxy Base
- Use the thickened epoxy to cast a base under the hardware when mounting hardware to a curved or uneven surface, or mounting hardware at an angle to the surface.
- Prepare the fasteners, holes, substrate, and base as described above.
- Bond small blocks to the substrate to support the base at the desired height and position (e.g. winch base)
- Apply enough thickened epoxy to cover the blocks. If the gap between the base and the surface is over 1/2″, fill the gap in two separate layers to avoid exotherm.
- Place the hardware in position, resting on the blocks and install the fasteners.
- Smooth the excess epoxy into the desired fillet shape around the base. Allow the epoxy to cure fully before loading. Protect exposed epoxy from UV.
 Bond threaded rods or studs into the substrate as an alternative for easily removable hardware.
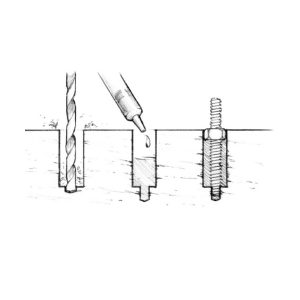
Epoxy Bonding Studs
- Bond threaded rods or studs into the substrate (instead of bolts or screws) and attach the hardware with nuts. This variation is appropriate for many engine, motor, or machine installations. Coat the base with wax /mold release to make the hardware removable. Although the hardware is not “bonded” to the substrate, the epoxy still provides a bearing surface that perfectly matches and supports the base of the hardware.
- Prepare the studs/threaded rods by waxing the upper ends (above the surface) and cleaning the lower ends (below the surface). Place a nut on the stud positioned with the top of the nut slightly above the surface and a washer on the studs. Wet out the lower ends and push them into the epoxy-filled holes. Allow the epoxy to cure thoroughly before tightening the nuts.
- Fill the hole 2/3 full with epoxy. Allow the epoxy to penetrate, and refill as necessary.
- Wet out the lower end of the stud and push it into the epoxy-filled hole. Top off the hole or clean away excess epoxy as necessary. Allow the epoxy to cure thoroughly before attaching hardware and tightening the nut.
Removing Epoxied Fasteners
If you know that you will want to remove the fastener, you can coat the threads with wax or mold release, which contaminates the surface enough to prevent a good epoxy bond.
Remove a permanently bonded fastener by applying heat to the head of the fastener with a soldering iron or propane torch. Use a heat shield to protect the surrounding area. Heat will travel down the fastener, softening the epoxy in contact with it. At about 120°F the epoxy should soften enough to allow the fastener to be backed out. Allow more time for heat to travel down longer or larger diameter fasteners.
Learn more about hardware bonding
Read about WEST SYSTEM technical advisor Tom Pawlak’s experience with hardware bonding in Epoxyworks issue number 13.